Post Syndicated from Peter Cohen original https://www.backblaze.com/blog/securely-erase-mac-ssd/

If you’re prepping your Mac for sale, trade-in or handing it down to a friend or relative, you should erase the hard drive first – that way your data won’t fall into the wrong hands. If your Mac is newer and has an SSD, you need to take additional steps.
Securely erasing your Mac’s hard drive
We’ve already covered how to prep your Mac’s hard drive to make sure that what’s on the drive is securely deleted. Using a process called “zeroing out,” you overwrite the entire contents of the disk with binary zeroes.
Users with a need for even more security can use a 7-pass erase feature that writes data over free disk space seven times. Short of hitting the hard drive with really expensive forensics gear, this guarantees you your data is gone for good.
There’s a hitch, though: Those instructions only apply to older Macs with conventional hard disk drives. They do not help if you have an SSD.
Securely erasing SSDs, and why not to
Most new Macs ship with solid state drives (SSDs). Only the iMac and Mac mini ship with regular hard drives anymore, and even those are available in pure SSD variants if you want.
If your Mac comes equipped with an SSD, Apple’s Disk Utility software won’t actually let you zero the hard drive.
Wait, what?
In a tech note posted to Apple’s own online knowledgebase, Apple explains that you don’t need to securely erase your Mac’s SSD:
With an SSD drive, Secure Erase and Erasing Free Space are not available in Disk Utility. These options are not needed for an SSD drive because a standard erase makes it difficult to recover data from an SSD.
In fact, some folks will tell you not to zero out the data on an SSD, since it can cause wear and tear on the memory cells that, over time, can affect its reliability. I don’t think that’s nearly as big an issue as it used to be – SSD reliability and longevity has improved.
If “Standard Erase” doesn’t quite make you feel comfortable that your data can’t be recovered, there are a couple of options.
FileVault keeps your data safe
One way to make sure that your SSD’s data remains secure is to use FileVault. FileVault is whole-disk encryption for the Mac. With FileVault engaged, you need a password to access the information on your hard drive. Without it, that data is encrypted.
There’s one potential downside of FileVault – if you lose your password or the encryption key, you’re screwed: You’re not getting your data back any time soon. Based on my experience working at a Mac repair shop, losing a FileVault key happens more frequently than it should.
When you first set up a new Mac, you’re given the option of turning FileVault on. If you don’t do it then, you can turn on FileVault at any time by clicking on your Mac’s System Preferences, clicking on Security & Privacy, and clicking on the FileVault tab. Be warned, however, that the initial encryption process can take hours, as will decryption if you ever need to turn FileVault off.
With FileVault turned on, you can restart your Mac into its Recovery System (by restarting the Mac while holding down the command and R keys) and erase the hard drive using Disk Utility, once you’ve unlocked it (by selecting the disk, clicking the File menu, and clicking Unlock). That deletes the FileVault key, which means any data on the drive is useless.
FileVault doesn’t impact the performance of most modern Macs, though I’d suggest only using it if your Mac has an SSD, not a conventional hard disk drive.
Securely erasing free space on your SSD
If you don’t want to take Apple’s word for it, if you’re not using FileVault, or if you just want to, there is a way to securely erase free space on your SSD. It’s a little more involved but it works.
It requires you to use Apple’s Terminal app, which you can find in your Mac’s Utilities folder. Terminal provides you with command line interface access to the OS X operating system. You can access Terminal from the Mac’s Recovery System, as well. Once your Mac has booted into the Recovery partition, click the Utilities menu and select Terminal to launch it.
From a Terminal command line, type:
- diskutil secureErase freespace VALUE /Volumes/DRIVE
That tells your Mac to securely erase the free space on your SSD. You’ll need to change VALUE to a number between 0 and 4. 0 is a single-pass run of zeroes; 1 is a single-pass run of random numbers; 2 is a 7-pass erase; 3 is a 35-pass erase; and 4 is a 3-pass erase. DRIVE should be changed to the name of your hard drive. To run a 7-pass erase of your SSD drive in “Peters-Macbook”, you would enter the following:
- diskutil secureErase freespace 2 /Volumes/Peters-Macbook
And remember, if you used a space in the name of your Mac’s hard drive, you need to insert a leading backslash before the space. For example, to run a 35-pass erase on a hard drive called “Macintosh HD” you enter the following:
- diskutil secureErase freespace 3 /Volumes/Macintosh\ HD
Something to remember is that the more extensive the erase procedure, the longer it will take.
Your type of drive
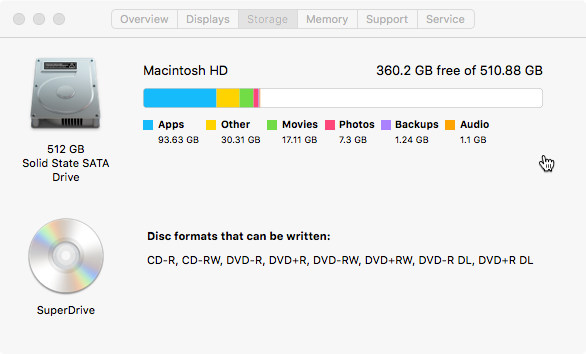
One final thing, and maybe this should have been first, before you can securely erase your files on your Mac, you need to know if you have a standard hard drive or an SSD. To find out, or at least to make sure, you click on the Apple menu and select “About this Mac”. Once there select the “Storage” tab to see which drive is in your system.
The post How to securely erase a Mac SSD appeared first on Backblaze Blog | The Life of a Cloud Backup Company.